In This Article
If you love to modify your Android device then TWRP (Team Win Recovery Project) is one of the most widely recommended recoveries for phone and tablet devices running Android OS. So if you are wondering how to install TWRP on your device then this step-by-step tutorial will help you.
Before we dive into the actual process of installing TWRP recovery on an Android device, a little introduction on the subject will give you more understanding of what you are going to do and you will be less likely to make a mistake in the process.
1. Prerequisites of Installing TWRP
First, you will need to know the exact phone model number which is usually given on the box of your device. If you don’t have the box then don’t worry as Android phones have their model number in their ‘About Device’ section, which is located in the ‘Settings’ menu.
Once you have found the correct model number, you can do a Google search for the codename of your device.
For example, the codename of the Huawei Honor 5x is ‘kiwi’, Samsung Galaxy S9+ (Exynos variant) is ‘star2lte’, and Samsung Galaxy S9+ (Snapdragon variant) is ‘star2qltechn’.
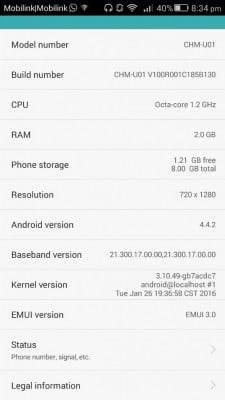
Once you have found the correct model and codename of your Android device then head over to the TWRP website to check whether the recovery is available for your variant of the device.
In case your device is not listed there then you can search through different forums like XDA Developers for an unofficial version of TWRP recovery. But you should keep in mind that an unofficial recovery can have known bugs or other issues, details of which you can find on the link where you found the recovery.
Also, there is a possibility that the custom TWRP port hasn’t been developed through the recommended methods of TWRP so it hasn’t got official status. Other than that there are usually no other problems.
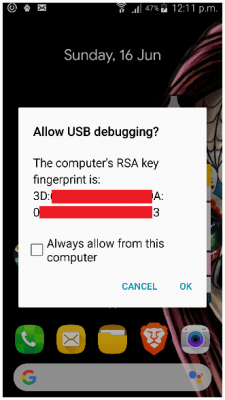
Anyways, the second thing you need to do is turn on USB debugging on your device. Here is how to do that:
- Navigate to Setting > About Device.
- Tap the Build Number eight times. On your eighth tap, you should see a toast message that says, “You are now a developer”.
- Now go back to Settings > Developer Options.
- Look for USB debugging and turn it on.
A Word Of Warning
Installing TWRP recovery is a fairly easy process only if you are patient and can follow the steps exactly. If you can’t understand the given instruction then you should avoid the whole process for the sake of your own device.
Installing a custom recovery on Android may seem like a simple process like copying, pasting, and downloading a bunch of tools from links. But if the guide is not followed correctly then you might end up with a phone that is unable to boot, or even worse, a phone that is not even able to recognize a USB connection which is actually a hard-bricked state and is almost impossible to be fixed.
You may continue beyond this step if you understand all the risks mentioned earlier.
2. Unlocking The Bootloader
Before installing the recovery please make sure, your Android device is at least 70% charged, the data cable you are going to use for this process connects properly to your device and the connection is not loose, and you have created a local backup of all the important data stored on your Android device.
Most carrier-unlocked devices come with an unlocked bootloader or at least an unlockable bootloader so that the consumer can unlock it easily. If you want to unlock the bootloader of your Android device then the steps are quite simple:
- Navigate to Settings > Developer options.
- Tap on OEM unlock.
- After checking OEM unlock, perform a factory reset on your device.
In case your Android device is old, you might not find the above option in the developer option and you can get to unlocking the bootloader right away.
For Samsung devices, the above method easily unlocks the bootloader, however, for other devices you may need to go through additional steps which you can find out by searching the Internet for the specific model number of your Android device.
Huawei no longer officially provides bootloader unlocking and there are some carrier-locked devices that also do not allow bootloader unlock. The most notable brands that still allow the unlocking of bootloaders are Samsung, Google, Motorola, Xiaomi (they’ve made the process very complicated), OnePlus, and HTC. For other manufacturers, you can search the web as that is another topic.
3. How to Install TWRP Recovery using ADB Commands
For Samsung Devices
Once the bootloader is unlocked you can now download the appropriate version of ‘Odin’. Droidviews has created an Odin compatibility list, which is a wonderful resource. So check that out to find the correct Odin version required for the process and then download that Odin on your computer. Please note that Samsung does not officially provide Odin so you have to search for that on the Internet.
After getting the right Odin version, you need to install the Samsung USB drivers which you can obtain from the official Samsung website here. Install the drivers on your PC and then reboot your PC. That’s pretty much it.
Once the computer boots up, then you need to copy the recovery.img.tar that you previously download from twrp.me and place it into the directory where you have extracted the Odin tool.

Right-click on Odin and run it as administrator. Click on the AP/PDA button and browse to the directory where you stored TWRP recovery and select that file. You don’t need to bother with any other options or settings on Odin.

Now you need to follow these steps:
- Turn off your phone.
- Press and hold the Volume Down + Home + Power buttons.
- Release the Power button when the display turns on and then release the other two buttons when you enter a screen like the one shown below.


- Press the Volume Up button to continue to the Download mode.
- Connect your phone to your PC through a USB cable. Odin will show “Added” in the log.
- Press the Start button on Odin and wait until the process is completed.
- When the process is completed, press the Volume Up + Home button before the phone boots up (but before doing that please make sure that Odin has shown the process as successful, otherwise your device may get bricked).
For Google Pixel/Nexus Devices
The first step is to set up ADB and Fastboot on your computer which can be done through this link. So download the file and extract it.
Then, we have to install the drivers for your Android device, and for that, we can use XDA-Developers member Snoop05’s tool. Run the tool as admin. Skip the installation of ADB and Fastboot as we have already downloaded the newer version since Snoop05’s tool comes with an older version of ADB and Fastboot.
As we are done with setting up ADB, Fastboot, and driver, now we can move towards installing the recovery.
- On your computer, place the recovery.img file in the same folder where ADB and Fastboot are located.
- While in the same folder, hold the Shift key on the keyboard and right-click on the folder and click on “open PowerShell windows here.”IMPORTANT: If in the context menu, you find “open command prompt windows here” instead, you may omit “./” (without the quotes) from the steps explained beyond this point. Also, all the commands are without double quotes.
- Connect the phone to the computer and type “./adb devices” (without the quotes).
- Unlock the device and allow the ADB request (if you have connected your phone through ADB before then through this pc then this step is not required).


- Now type “./adb reboot bootloader” (Your device will reboot into bootloader mode, wait for it).
- Now type “fastboot flash recovery recovery.img” (recovery.img is the name of the recovery file which in our case was twrp-3.2.3-0-bullhead.img, you may write the name of your recovery file).
- Wait for the process to complete and type “fastboot reboot”.
After reboot, your device will have TWRP recovery installed.
4. Installing TWRP Recovery using Root
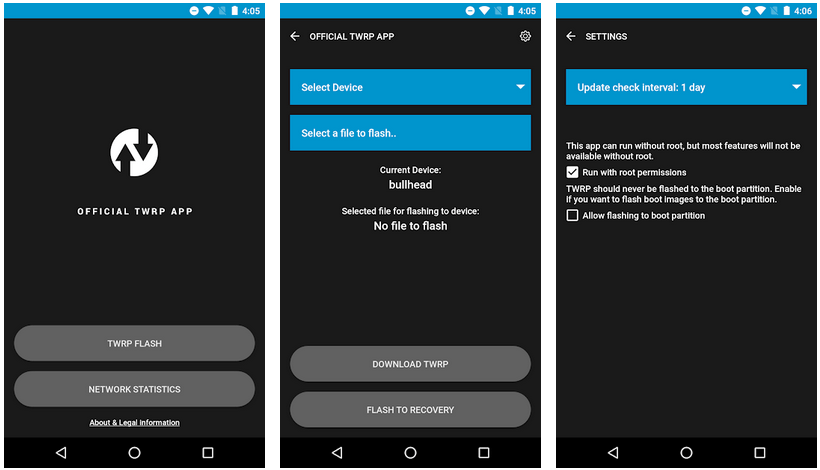
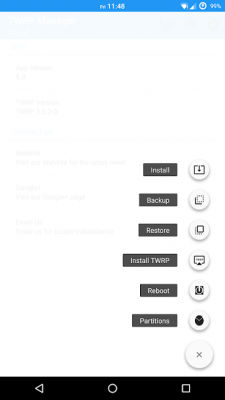
If you were able to root your device and have root permission on your device then you can also use the “TWRP Manager” app, which can be downloaded from the Google Play Store.
Click on install TWRP, but first, you need to make sure the device shown there is the correct one as TWRP Manager will download the recovery and flash it automatically. Once the custom recovery has been installed, then you can also use the app to boot into recovery.
What is Android Recovery?
Android recovery is an integral partition in Android that provides an alternative boot partition that lets the device boot up in case there is a problem with the boot partition or the system partition (that actually has the OS). As the name suggests it provides a recovery console and other tools to perform recovery or maintenance operations on the Android device.
Every Android comes with a recovery (partition) installed into it and as explained earlier it is an important partition. However often OEMs, like the version of Android, modify the recovery for improving the experience of their consumers. One such example can be found in the recovery of the Xiaomi phones.
Not only do manufacturers modify recovery, but developers also make customized recoveries (since Android is an open-source project) which are available publicly. Most notable of them are CWM (Clockwork mod or Phillz) and TWRP recovery.
Benefits Of Custom Recovery
A custom recovery can let you install a custom Android operating system on your device. It allows you to make a complete backup of the system called ‘NANDROID backup’ and enables you to restore them at your convenience.
Not just backups, with the help of custom recovery you can also update your Android device to the latest version of the Android operating system (given that the compatible update is available).
Custom recovery also allows us to install root binary like SuperSu, Magisk, or popular mods like Viper4Android. Other than that, it also provides other advanced features that a normal recovery would provide plus it also gives you the ability to mount and unmount data partitions, move files into the device without booting the operating system, format and resize partitions, and whatnot.
About TWRP Recovery
TWRP recovery is created by TeamWin hence the name “Team Win Recovery Project”. Initially, it was a team of only four people but later on, due to the project being open source, the contribution of many contributors made the recovery quite popular.
TWRP got famous and stole the position of being the most preferred custom recovery from CWM in the days of Android 4.4 KitKat. And the reason for its popularity and early adaptability was that the interface of the TWRP was very well laid out for every type of user and it offered touch controls, which at that time CWM and stock recovery lacked.
For those of you who are wondering, CWM did catch up and got renamed as Phillz recovery but it couldn’t compete with the much wider preference and choice of the developers and community.
Disadvantage Of TWRP Recovery
TWRP itself doesn’t have any disadvantage rather it mostly comes from the fact that you have unlocked the bootloader and you are running a custom recovery, so whenever you flash a custom recovery whether it is TWRP, CWM, or any other, you are most likely to lose the ability to update your phone through OTA (Over The Air) on the stock version of Android because installing custom recovery breaks the OTA update.
There are also security-related issues with custom recovery. Moreover, by unlocking the bootloader of your Android device you are going to lose Android Pay and in most cases warranty and support for your device from the manufacturer.
Modern Trend And Community
Installing TWRP is only a good idea if you like flashing your phone or you are a developer. Today phones have ample features and storage which is the main reason why people are going towards flashing their phones which frees them from any limitations.
Flashing a phone with custom recovery and then modifying the system files can help increase the performance of the phone, you can improve battery life or may improve the camera or sound through a mod. All of this depends on the availability of the mods and custom ROMs. Today we have reached the point where people question the need for rooting or modifying the device and communities are also less active than they were in the past.

