In This Article
Creating video content can be challenging, especially when editing and making adjustments. One big reason is that there’s so much to learn, which can take a long time. This is especially true when using advanced video editing software like Adobe Premier Pro. That’s why content creators always look for helpful tutorials to save time and make their work easier.
The top choice in this scenario will be the video stabilizer. This tool works in a manner just like the video editor for YouTube. Uncover everything about this unique and incredible tool right in this guide. From definition to working and much more. Let’s dive right in!
What are Video Stabilizers?
A video stabilizer is a handy tool for steadying your videos. This app stands out because of its cutting-edge technology and advanced AI algorithm. These features work together to remove unwanted vibrations, movements, or shakiness from your videos. With this video stabilizer, you can quickly fix these issues on the fly. Plus, since the tool is available online, it’s easily accessible for anyone to use.
How to do Post Video Stabilization?
Like other tools, the video stabilizer also has a specific working method. It involves a few simple steps that you need to follow. Here they are:
- Visit CapCut Website: To get started, go to the CapCut platform. Once on the main page, look for the menu bar at the top. Click on the tool section in the menu bar to see more options. A drop-down menu will appear. From there, select the video section and choose the video stabilization tool. Click on it, and you’ll be taken to the main webpage for the video stabilizer.
- Upload The Video: The video stabilizer offers two easy ways to stabilize your videos. You can drag and drop the video file from your computer or click the upload video tab on the central tool platform. If you don’t have a video to upload, you can use the sample templates to test the tool. It’s a great way to see how well it works!
- Wait For Processing: Once you’ve uploaded your video, you don’t need to do anything special with the tool. Just sit back and wait to see the results! The video stabilizer uses AI technology to improve your video automatically. You can preview its changes by clicking the video stabilizer window in the top right corner. Easy peasy!
- Download Stabilised Video: Once your video is all nice and steady, it’s time to save or share it. Just head to the top right corner and click on the export tab. A menu will pop up with lots of excellent options. You can share your video with TikTok or even use it for an ad. And if you want to get fancy, you can use the magic tool to tweak the speed and blurriness. There are so many possibilities!
Why You Should Use Video Stabilizer?
There are multiple benefits that you can experience using the video stabilizer. Some of the key benefits include:
Layman Suitability
You don’t need any special training to use the video stabilizer – it’s designed to be easy for anyone to use. The platform has a user-friendly interface and helpful guidance so you can figure out how to use it independently. And if you need extra help, videos are available to walk you through the process. That’s why video stabilizers are popular with many different people.
Auto Orientation Balancing
With the video stabilizer, you can easily adjust the orientation and balance of your videos. It automatically reduces shakiness and jitteriness, so you don’t have to do anything. The video stabilizer uses AI technology and gyroscope data to do your work.
Latest AI Algorithm
The video stabilizer uses an intelligent AI algorithm to automatically adjust every aspect of your video, like blurriness, shakiness, and cropping. You don’t need to worry about learning how to control it – the algorithm does all the work for you!
Free to Use
The video stabilizer is entirely free to use! There are no fees, no charges, just smooth, stable videos. Access it online and start using it right away. This tool is unique because it’s available for anyone to use at no cost. You won’t regret giving it a try!
Tips For Capturing More Stabilized Video
You can always smoothen your video with the help of tools, but it’s good practice to capture more established videos, and later, you can use tools if you need to improve any shaky parts. Capturing stabilized video footage can be a challenge, especially when shooting handheld. However, there are several techniques you can use to minimize camera shake and produce smooth, professional-looking results. Here are some tips:
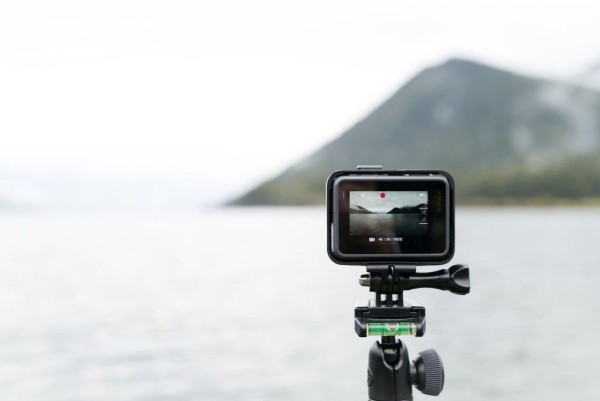
- Use a tripod or monopod: A tripod or monopod is the best way to ensure stable video footage. They provide a solid platform for your camera and eliminate camera shake caused by your hands.
- Hold the camera correctly: If you’re not using a tripod or monopod, it’s essential to hold the camera correctly to minimize camera shake. Hold the camera close to your body with your elbows tucked in. Keep your grip tight and avoid making any sudden movements.
- Shoot at a slower shutter speed: A slower shutter speed allows more light to enter the camera sensor, improving the video’s quality. However, a slower shutter speed can make the video more susceptible to camera shake. To compensate for this, you should use a tripod, monopod, or steady hold the camera.
- Use a wider field of view: A wider field of view will give the video editing software more room to work with when stabilizing the footage. This can help to reduce the amount of cropping that is required, which can preserve more detail in the final video.
- Use image stabilization: Most smartphones and cameras have image stabilization built in. This can help reduce camera shake, but it is not a substitute for proper technique.
- Use a gimbal: A gimbal is a motorized device stabilizing your camera by keeping it level and steady. Gimbals are expensive but a great way to get smooth, professional-looking video footage.
- Shoot in 4K: If you have a camera that can shoot in 4K, you can have more room to work with when stabilizing the footage. 4K resolution has four times the pixels of 1080p resolution, which means the video editing software has more detail to work with when stabilizing the footage.
Now that you’ve learned the simple way of video stabilization, it’s time to take your content creation to the next level. Whether you’re a vlogger, filmmaker, or social media influencer, smooth and steady footage is essential for captivating your audience. With these techniques in your toolkit, you can produce professional-looking videos that keep viewers engaged from start to finish. So grab your camera and start filming – the world is waiting to see your stabilized creations!


